 November 5, 2023
Vegetables
November 5, 2023
Vegetables
November 5, 2023
Vegetables
November 5, 2023
Vegetables 


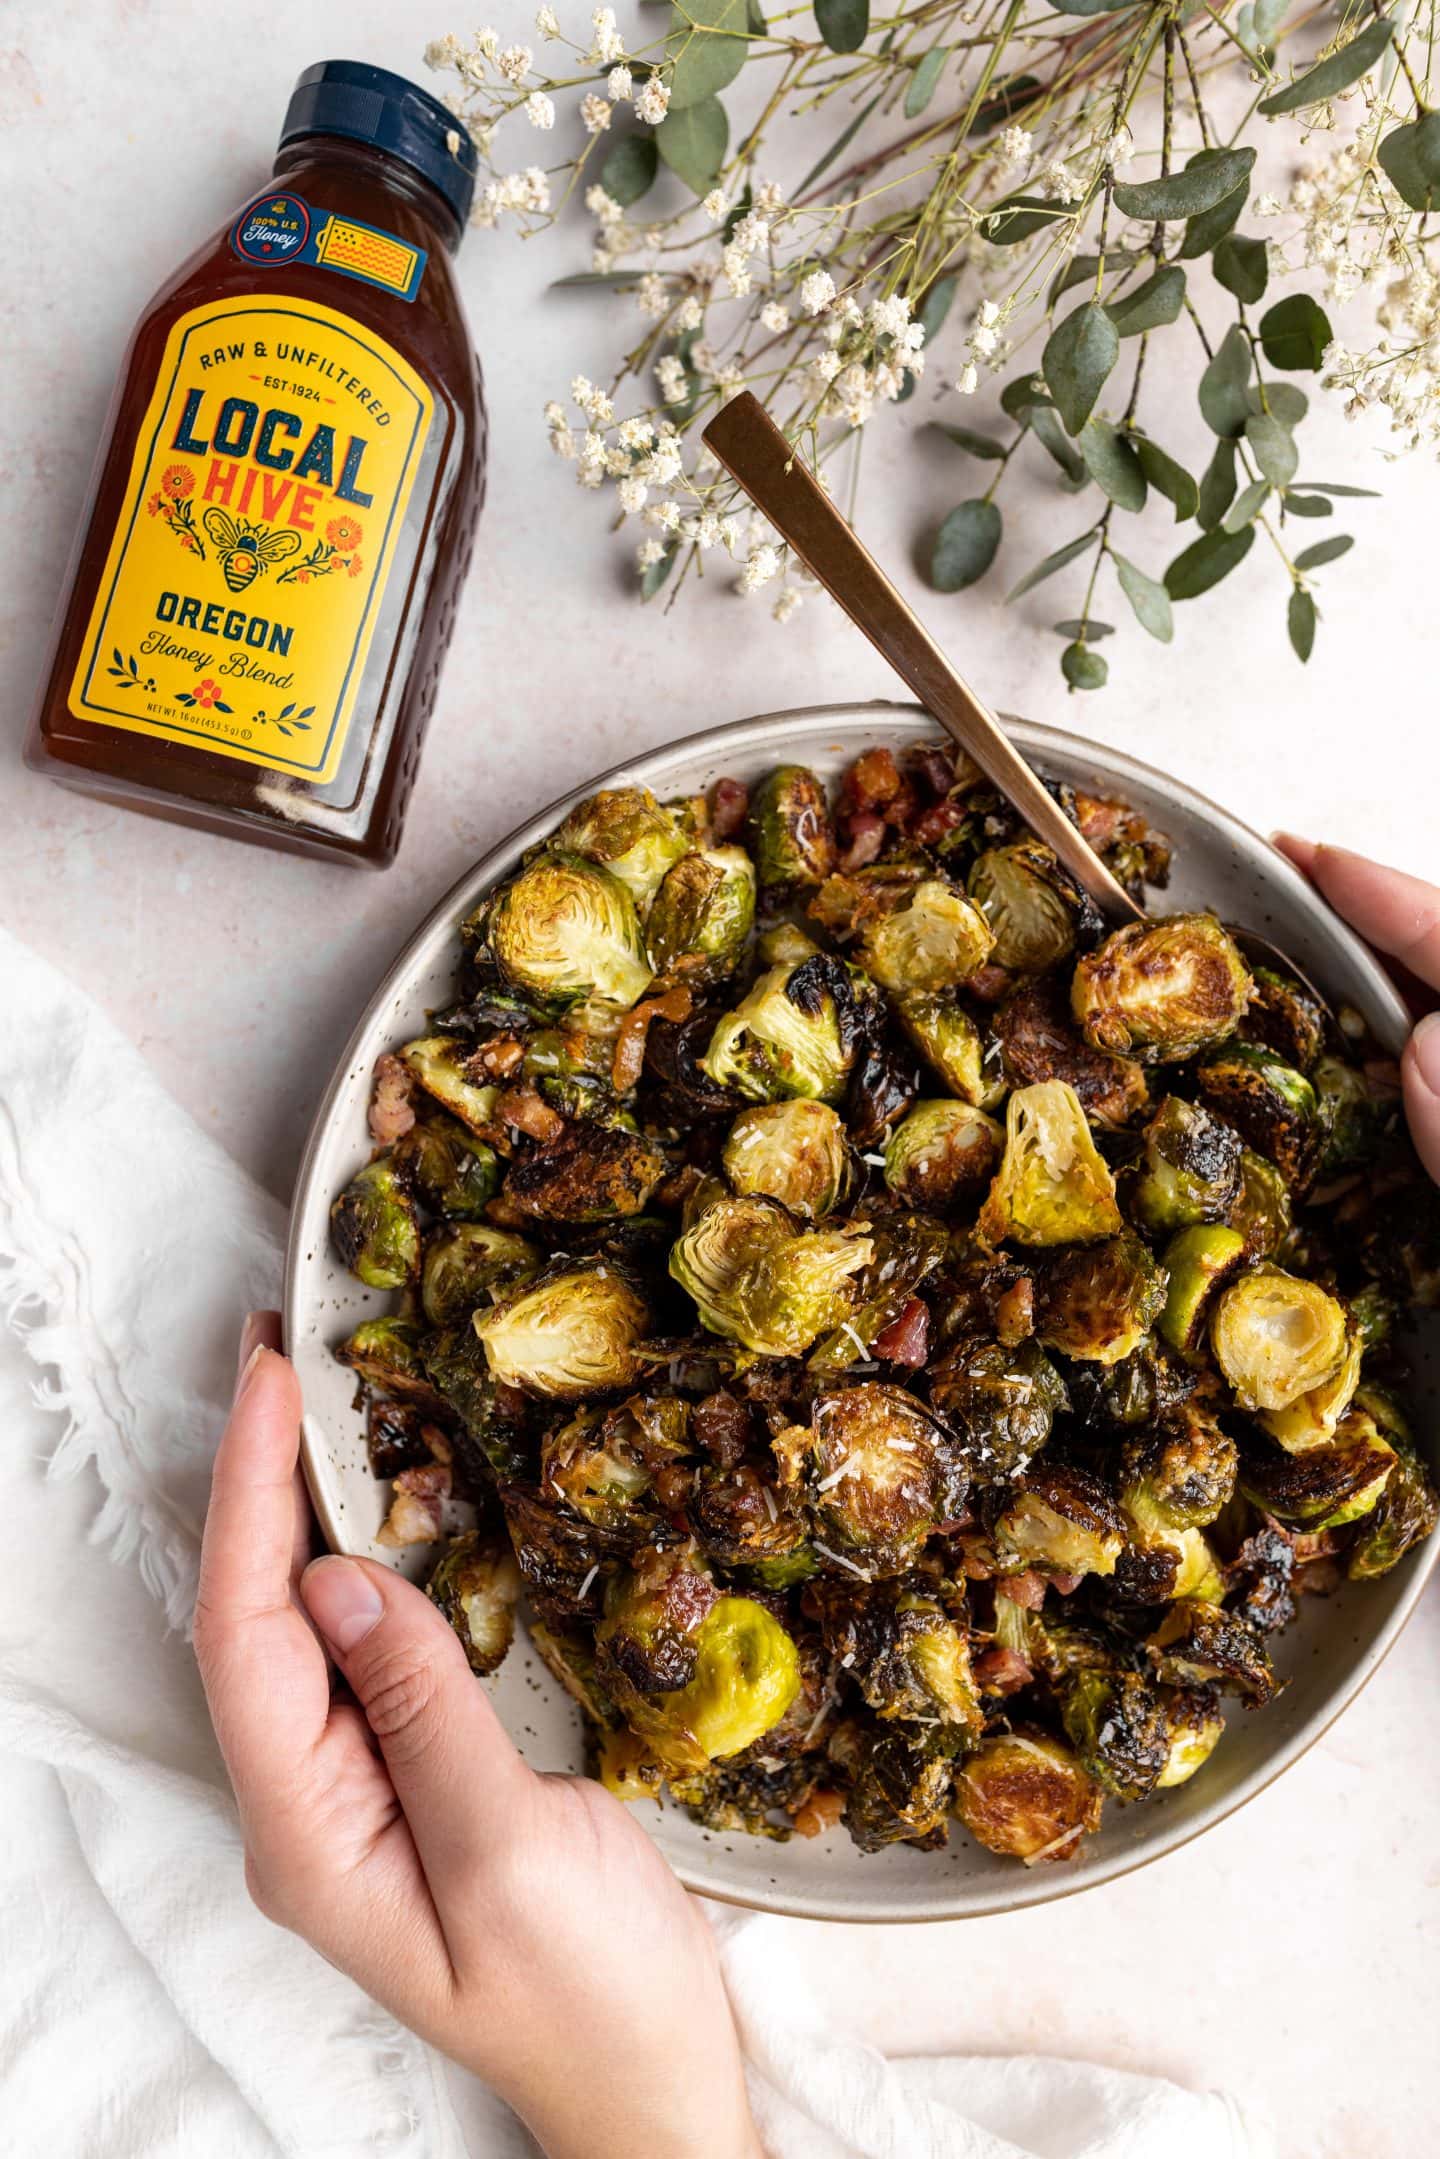
These restaurant style honey pancetta Brussels sprouts are a perfect side dish to any holiday dinner. With the holidays right around the corner, yea I am looking at you Thanksgiving, this quick and easy side dish is a great one to serve to a crowd. With 4 ingredients (that is if you don’t count salt, pepper, + oil) and 20 minutes, they couldn’t be easier.
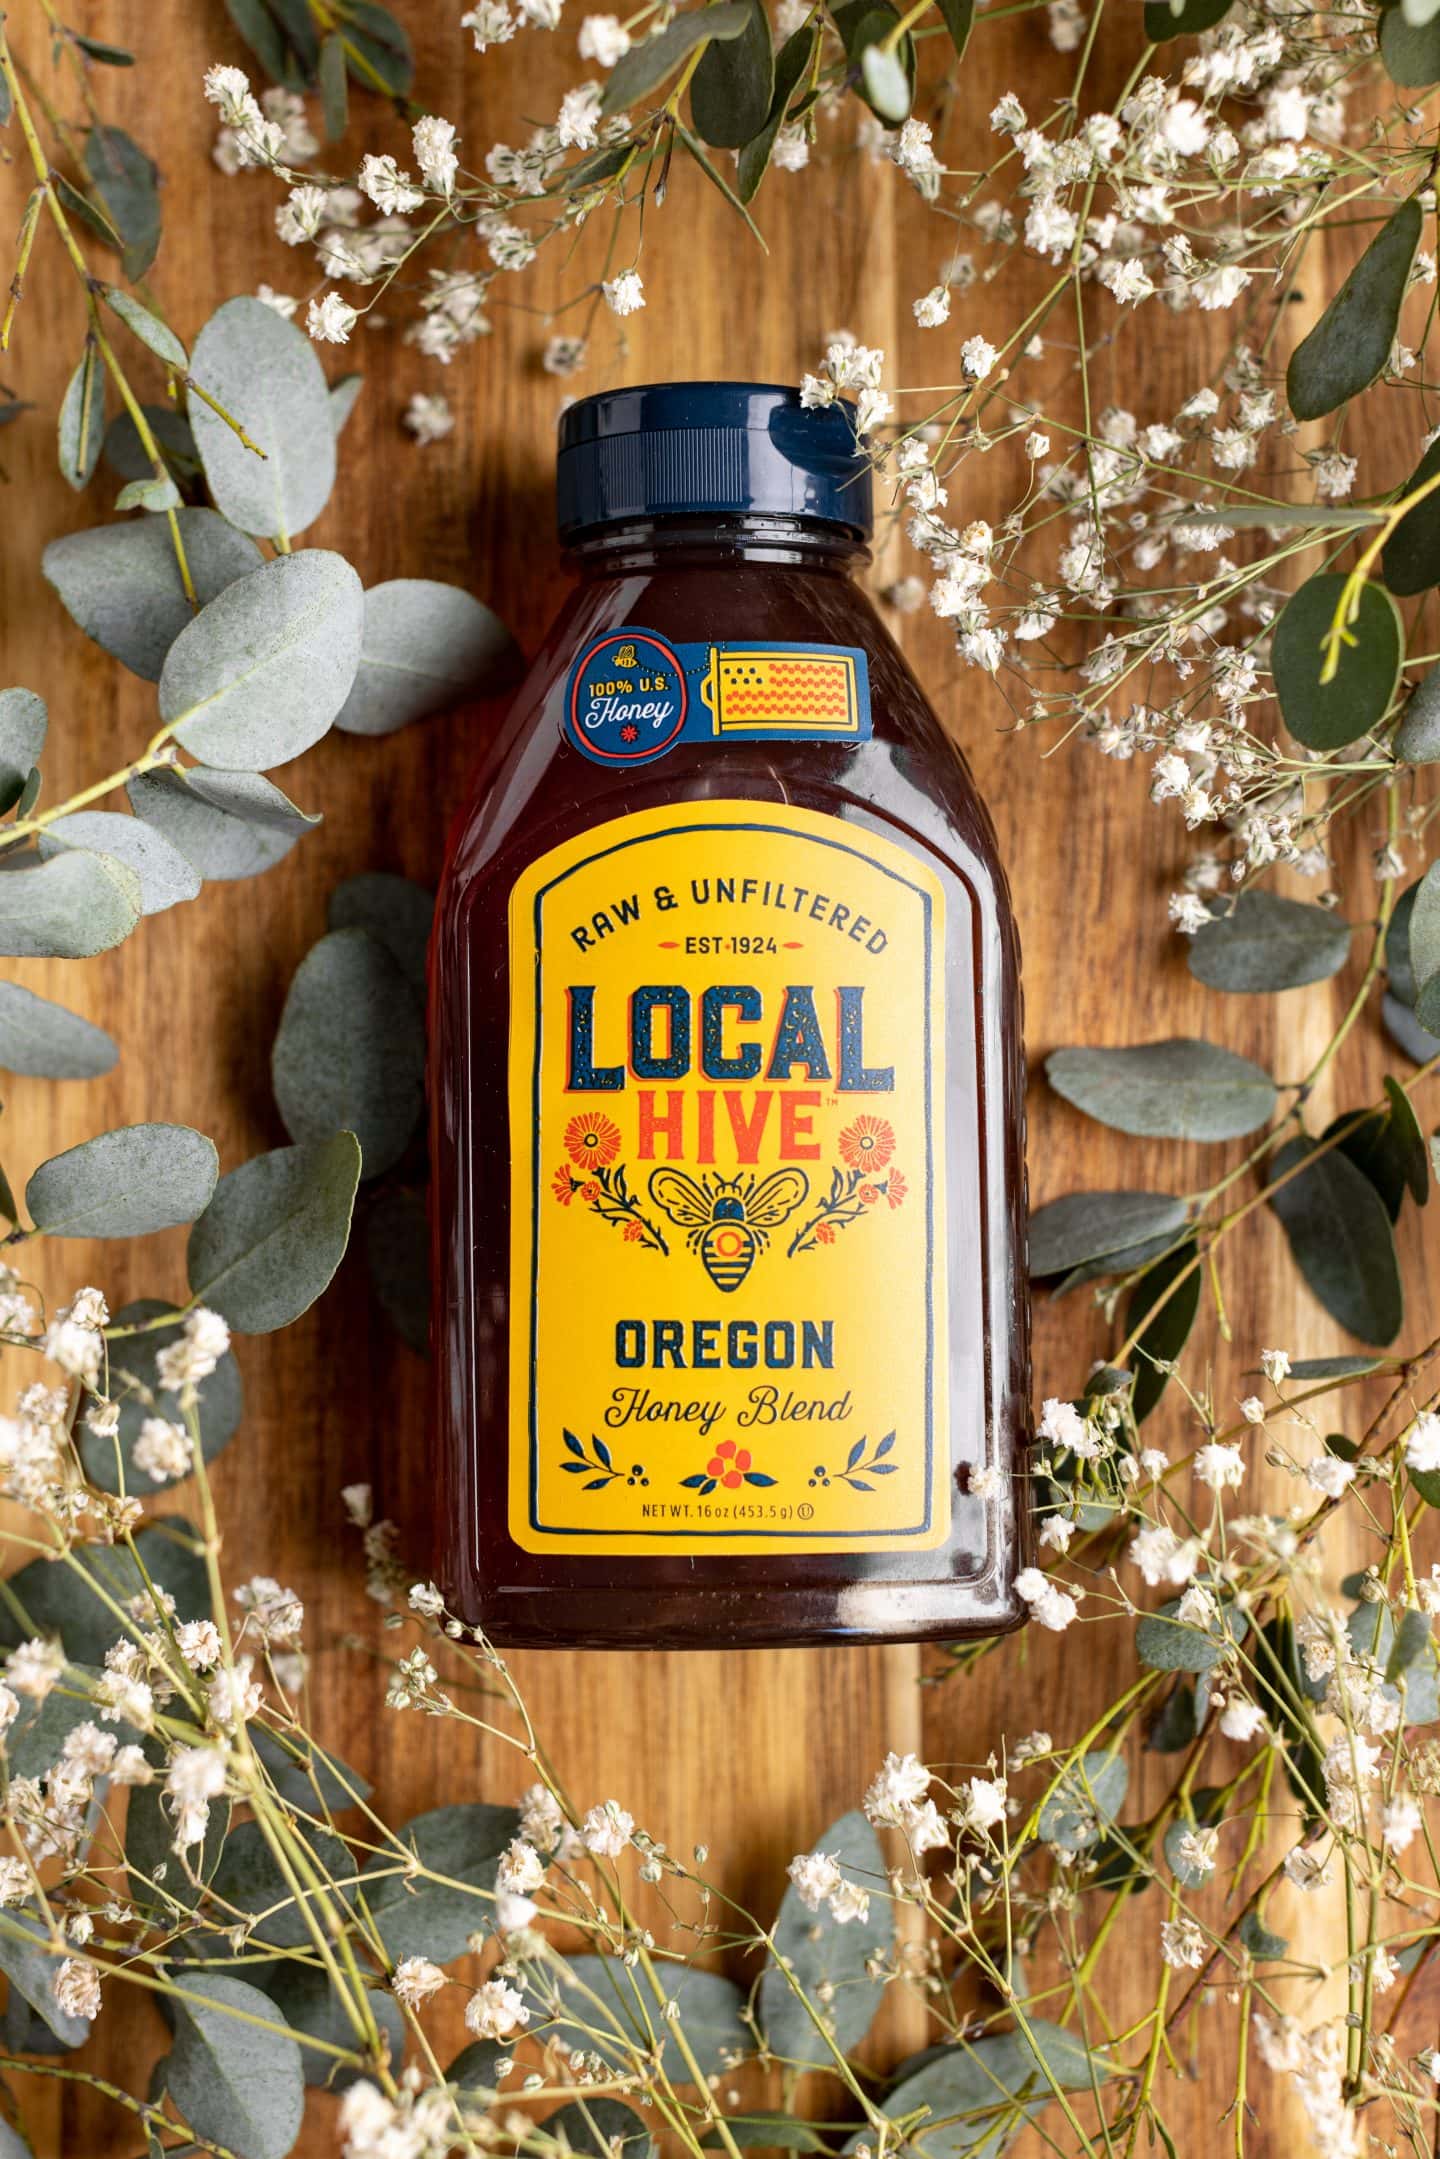
*This post is sponsored by Local Hive HoneyTM, as always, all thoughts and opinions are my own. Thank you for your support!
If you only use honey for your morning tea, and the occasional baked good you are missing out. Something magical happens when you do the final toss of the crispy cheesy roasted Brussels sprouts, and the rendered pancetta. If you ask me it beats traditional balsamic glazed Brussels sprouts. With that said this dish truly comes together with honey, and not just any honey, but good premium honey.
This recipe uses Local Hive’s Oregon varietal, which is smooth and earthy in flavor, a classic all-American honey. If you already have a favorite go-to Local Hive varietal use that, if not Oregon is a great place to start. To learn more about Local Hive HoneyTM, and snag a bottle of Oregon or any of their other varietals check them out HERE!

There is nothing worse than a soggy Brussels sprout. Maybe that’s why we all hated them as kids. Below are 7 tips on how to get perfect roasted crispy Brussels sprouts..
Brussels sprouts roast best in a high temp oven (minimum 400 degrees Fahrenheit), any lower and you will end up steaming them not crisping them. If you really want to get a crispy exterior on both the top and bottom my suggestion is to crank the oven up to 450 degrees.
In order to get crispy roasted Brussels sprouts, they need a generous amount of oil. Good rule of thumb, for every pound of Brussels use about 1 tbsp to 1 1/2 tbsp of oil. Make sure they are thoroughly coated. I like to season them in a large bowl and then lay them out on a sheet pan.
The other day I decided to roast chicken and cook Brussels sprouts at the same time. They both could be roasted at 425 so I decided why not. BIG MISTAKE, the addition of the chicken created so much moisture in the oven it ended up steaming the Brussels and gave them a horrible mealy texture. When roasting Brussels specifically, put them in the oven on their own. Also, don’t overcrowd the pan, make sure there is space in between each sprout.
Place the sprouts cut side down on the baking tray. Cut side down = more surface area touching the pan = crispier Brussels sprouts.
Believe it or not, the pan you use to roast does make a difference. I like using Nordic Ware pans, they are super durable and get a good crisp on roasted vegetables, not to mention they are a breeze to clean. If you opt for a darker pan, your Brussels will get a crispier bottom, but you are going to have to reduce the roast time from the directions below (check on them 5 minutes before). Darker pans cook faster. Whichever type of pan you choose absolutely DO NOT use a silicone baking sheet, and avoid glass pans.
If you have an electric oven where the heat source is on top and not on the bottom, do not cook the Brussels on the bottom rack. The top or middle rack are good options. Similarly, if you have a gas stove where the heat source is at the bottom, cook your Brussels on the bottom rack.
Wet sauces need to be added after the sprouts are done roasting. This includes honey, balsamic vinegar, and anything else that would add moisture.

.
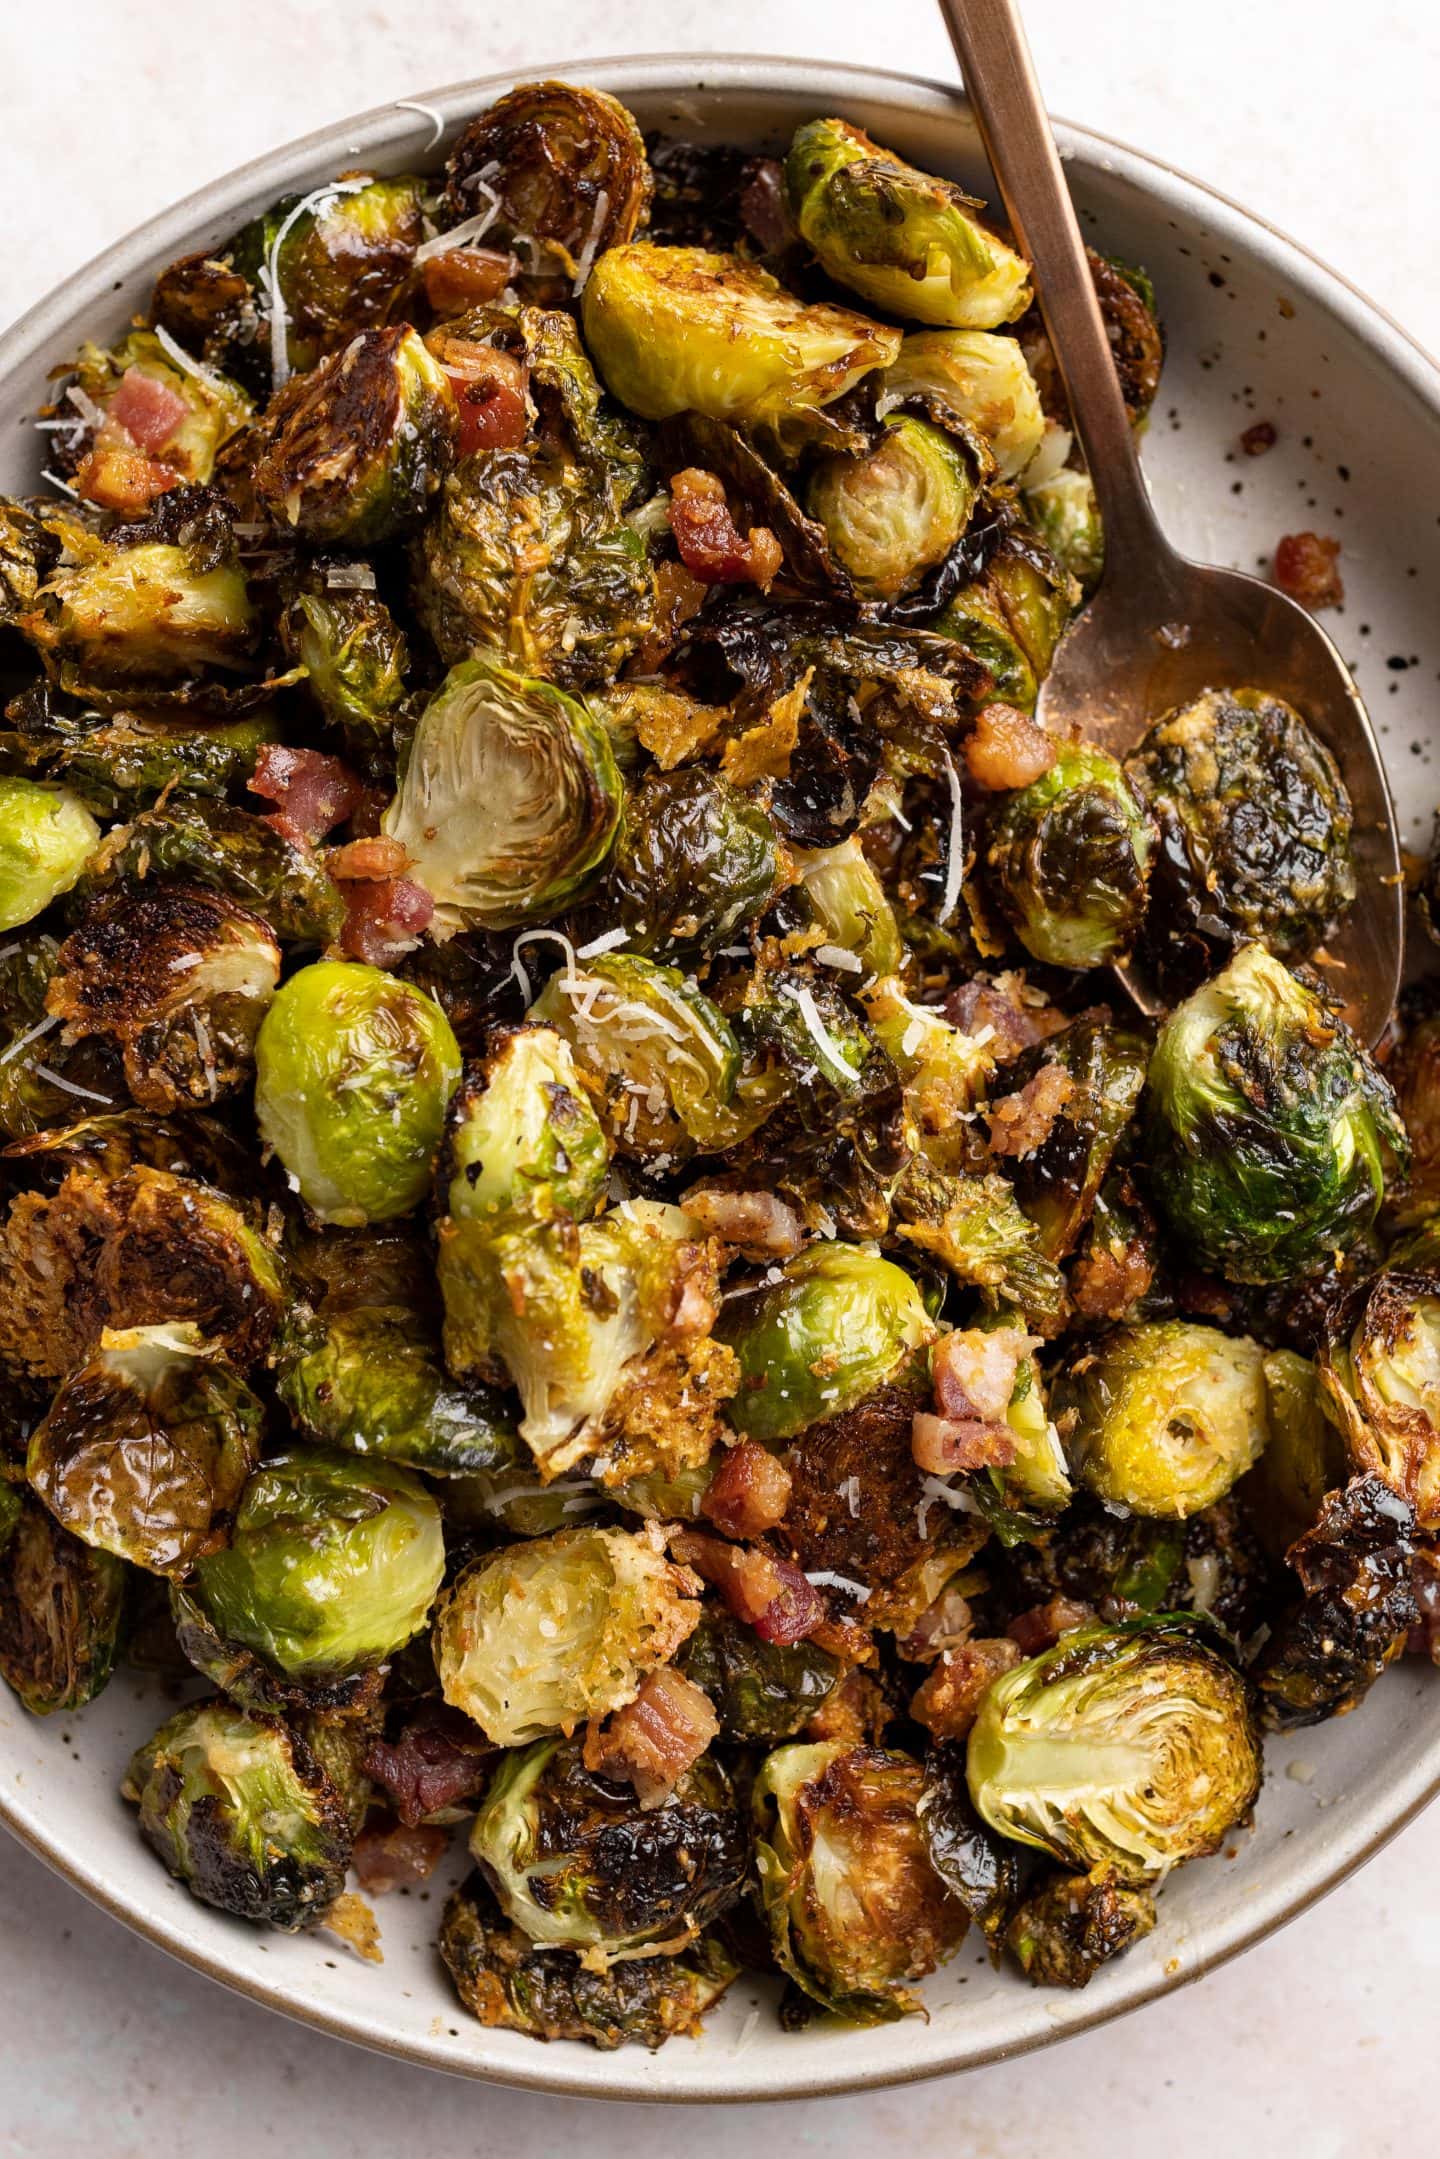
These crispy Brussels sprouts can be stored in an airtight container for 2-3 days in the fridge. To reheat I highly recommend throwing them in a 400 degree oven for a few minutes until warm. Microwaving them will result in mushy sprouts.
 November 5, 2023
Vegetables
November 5, 2023
Vegetables  September 19, 2022
Vegetables
September 19, 2022
Vegetables  May 26, 2024
Vegetables
May 26, 2024
Vegetables  September 2, 2024
Vegetables
September 2, 2024
Vegetables
I really enjoyed this recipe. Has great texture with the parmesan and the pancetta and the sweetness of the honey went well with their saltiness. I’ll be making this again.
So delicious and easy to make!
Cant wait to make these…maybe to day or to 🙋♀️👍😋